We’re so excited for you to begin publishing your OptinMonster campaigns! Use the checklist below to guide you through creating a campaign when you’re using the OptinMonster for WordPress plugin.
If you haven’t yet integrated OptinMonster with your WordPress website, we recommend using the OptinMonster for WordPress plugin to do that. Learn how to install the OptinMonster for WordPress plugin now.
Please follow our general Getting Started checklist instead.
Create an OptinMonster campaign by following the sections below, let’s get started!
Our conversion experts will design 1 free campaign for you to get maximum results – absolutely FREE! Click here to get started →
Create A Campaign
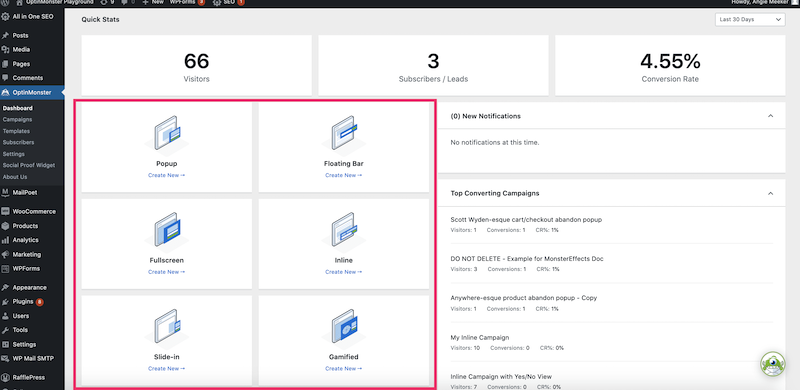
To get started creating a new campaign, choose one of the six Campaign Types and click Create New.
Not sure which one to choose? Learn more about each campaign type: Popup, Floating Bar, Fullscreen, Inline, Slide-in, and Gamified Fullscreens (available only with a Growth subscription).
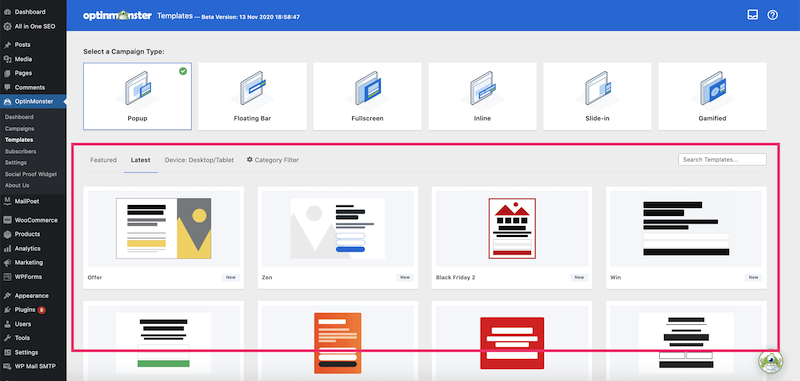
Next, browse the Templates available for that Campaign Type.
All OptinMonster templates appear on all devices and look great on every device. With a Pro or Growth subscription, you can also choose templates designed specifically for mobile devices by adjusting the Device Targeting filter.
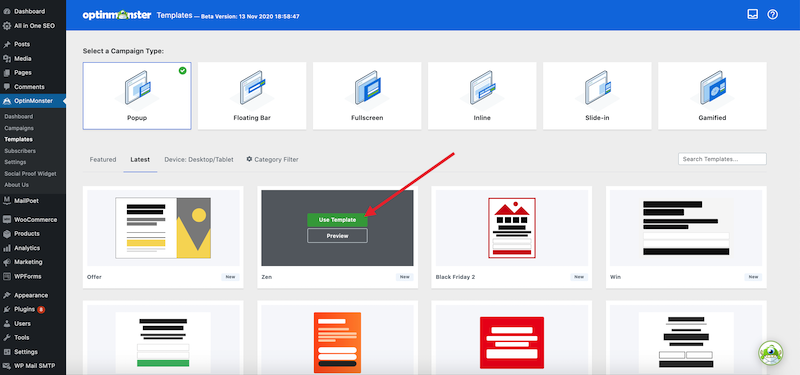
You can preview any template by hovering over it and clicking Preview.
When you’ve found a template you like, select Use Template.
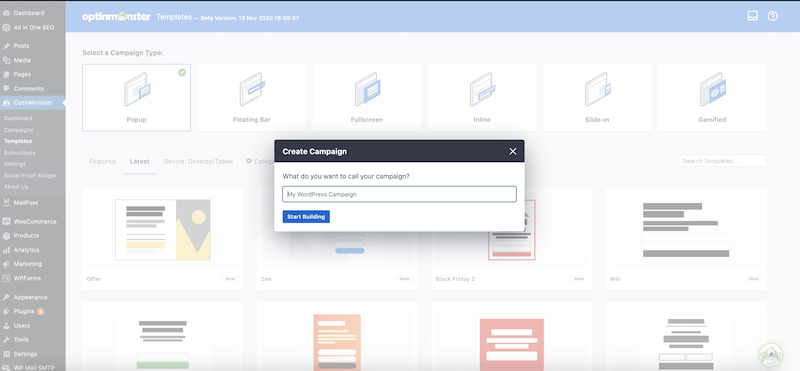
Name your campaign and click Start Building.
Plan The Success Action
Before you start designing your campaign, it’s important to keep in mind the overall goal of your campaign. What action do you want visitors to take when they see your campaign? Subscribe to your email list? Visit a page on your website? Download a file? Your goals determine the content of your campaign.
What happens after a visitor clicks a button in your campaign, or converts an optin form, is controlled by the Success Action of the buttons or forms in your campaign.
Success Actions can be adjusted by clicking on any button or form within your campaign.
You can choose from the following Success Actions:
- Show a View (Yes/No, Optin or Success View)
- Close the campaign
- Close campaign and refresh the page
- Redirect to a URL
- Open in a new Window (buttons elements only)
In this example, we’re going to assume you want to show your visitor an optin form, then a thank you message after they complete that form. Learn more about Success Actions here.
Design Your Campaign
When you first enter the builder to edit your new campaign, you’ll see the drag and drop editor in the Design tab. This is where you’ll edit the text, images, buttons and forms in your campaign.
We recommend following our guide to create your first campaign which provides a full walk-through of the campaign builder settings.
Configure Output Settings
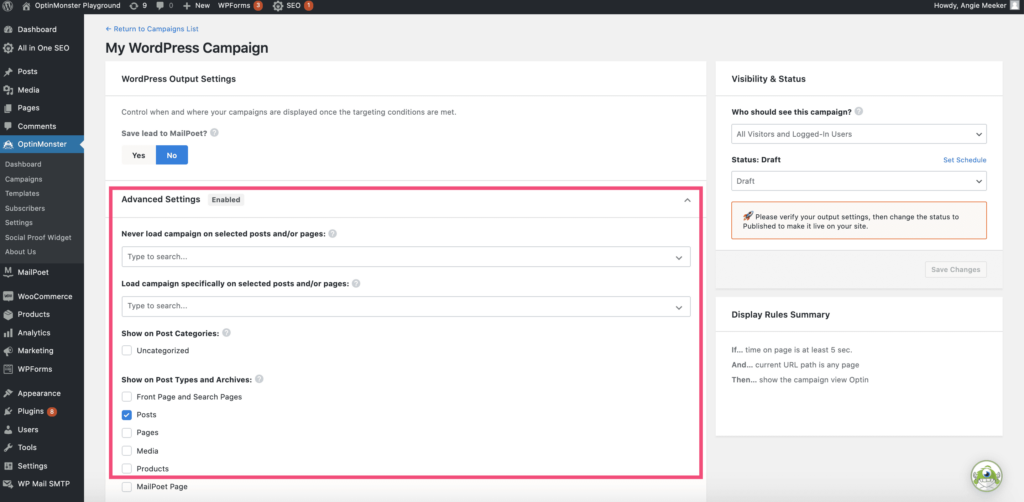
After you close the campaign, you’ll be directed to the Output Settings for this campaign in your OptinMonster for WordPress plugin. You can further target where your campaigns appear using the Advanced Settings.
Remember that your campaign must meet all of the conditions in your Display Rules, as well as the conditions you select in the Output Settings before it can appear.
In the screenshot above, the Display Rules allow the campaign to appear on any page of the site after 5 seconds. However, within the Output Settings, it is set to display only on Posts, so the campaign can appear on any page of the site that is a Post.
Publish The Campaign
When you’re done configuring your Output Settings, you’re ready to publish your campaign live to your site.
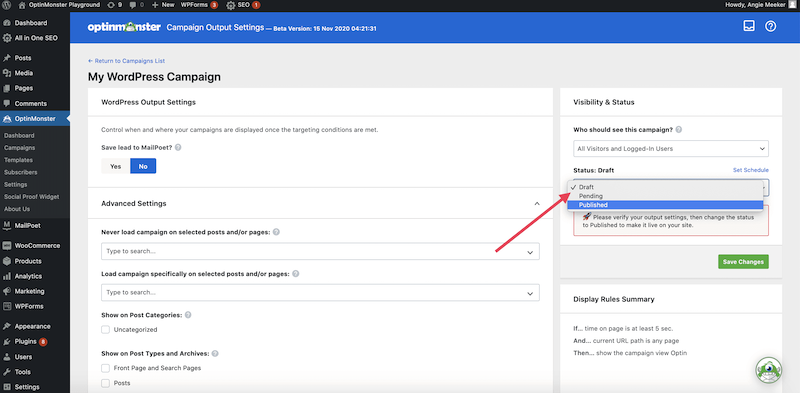
Under Visibility and Status, select who should see the campaign (all visitors, or only logged in visitors).
Then, change the status from Draft to Published, and click the green Save Changes button.
Congratulations! Your campaign is now live on your site!
What Next?
Your campaign is now appearing on your site. Visitors are either seeing it and converting it (YAY!) or seeing it and closing it without taking an action.
How often the campaign appears again after it has been seen or converted is controlled by the campaign’s Cookies. By default, all campaigns display again after 30 days if closed, but not converted. They appear again after 365 days if the campaign is converted.
You may want to adjust those cookies to better suit your goals.
Learn how to adjust the Cookies that determine how often a campaign can show to visitors.
When you’re ready to take your campaign to the next level consider implementing some of these features:
Split Testing
Split testing your campaign helps you improve conversions by testing different colors, copy, configuration settings and more.
MonsterLinks
You can show your campaign with the click of a link or button on your site with MonsterLinks!
Deliver Downloadable Files
Learn more about how to deliver downloadable content to subscribers when using OptinMonster.
Yes / No Campaigns
Use our Yes / No feature to add a two-step option to your campaign, or in place of collecting email addresses.
If you’re serious about jumpstarting your WordPress website and business growth, then get started with OptinMonster today!
Our conversion experts will design 1 free campaign for you to get maximum results – absolutely FREE! Click here to get started →

