Do you want to build trust and confidence in customers by displaying live sales notifications?
Live sales notifications are an effective way to build credibility by allowing visitors to see what others are doing. This can boost sales and conversions instantly.
We’ve put together step-by-step instructions on the best way to create a live sales notification for WooCommerce.
But before we dive into the tutorial, let’s touch upon some basics about live sales notifications you should know.
Why Use Live Sales Notifications?
When we see a busy store, our instinct tells us that the store has something great to offer. Why else would there be a crowd?
Live sales notifications mimic this effect and make your store look busy. Online shoppers are invisible to others but these notifications create a tangible presence.
These notifications add a sense of FOMO (fear of missing out) and urgency in shoppers that gets them to buy!
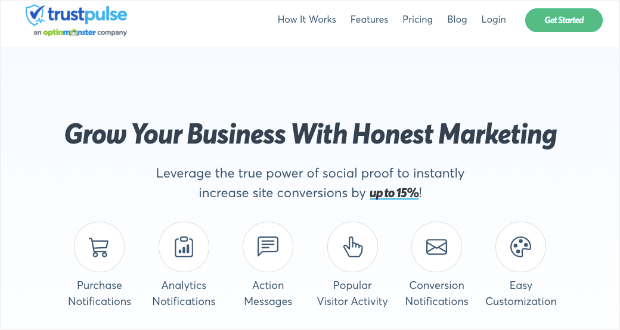
If you’re just starting out with your online store and don’t have sales yet, don’t worry. We’re going to use a tool called TrustPulse that helps you capture all sorts of activity including signups, registrations, page views, and more:
That means you can create a busy atmosphere without ever needing to create fake notifications that can seriously damage your business’s reputation in the long run.
Here are a few highlights of TrustPulse to show you what it can do for you:
- Incredibly easy setup
- Automated process to capture and display any activity
- 100% customizable popups with an easy-to-use visual builder
- Display group statistics instead of individual activity
- Create action messages with your own custom text
- Clickable popups to increase sales, upsells, and cross-sells
- Smart targeting features to display popups at the right time and place
Plus, TrustPulse integrates with Zapier. This means you can connect to 3000+ apps and marketing tools and capture activity from outside your website.
For example, you can track when a user leaves a review on Google and display that action on your website.
TrustPulse is also really affordable compared to other social proof tools in the market. Plans start at just $5 per month and there’s a 14-day risk-free money-back guarantee.
Now let’s head straight to the tutorial to create live sales notifications.
How to Create Live Sales Notifications
To follow along in this tutorial, you’ll want to sign up for TrustPulse.
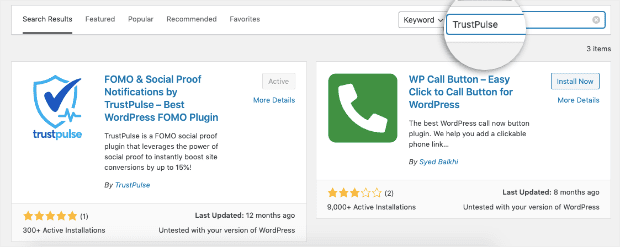
To connect your WooCommerce site to TrustPulse, install the FOMO & Social Proof Notifications plugin available in the WordPress repository.
Once activated, simply follow the onscreen instructions to connect your TrustPulse account.
Need more help? Follow this guide on how to integrate TrustPulse with WordPress.
Once you’ve done that, we can get started.
Step 1: Create a Live Sales Notification Campaign
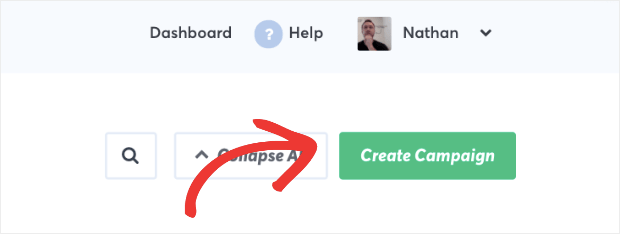
Log into your TrustPulse account to access the dashboard. Inside, click Create Campaign in the top right corner of your dashboard:
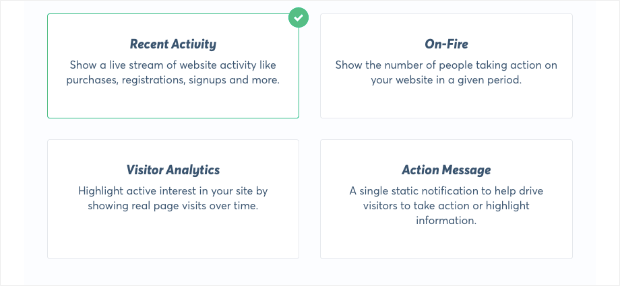
You’ll need to give your campaign a name so you can find it in the dashboard easily. Then, TrustPulse lets you create 4 kinds of campaigns for your site:
- Recent Activity: Display the recently purchased products from your WooCommerce store with a clickable link to the product page.
- On-Fire: Show the number of people taking action on your website in a given period.
- Visitor Analytics: Highlight active interest in your site by showing real page visits over time.
- Action Message: Display a custom message to help drive visitors to take action or highlight information.
Each of these campaigns helps you target different marketing goals. And with TrustPulse, you don’t have to choose just one.
You can create and run multiple campaigns together and organize them by importance. We’ll show you how to do that a bit later.
For this tutorial, we’ll show you how to create the Recent Activity campaign that will capture the actions of individual shoppers.
To move to the next step, hit the Next button. This will take you to the Appearance & Design tab where you can customize your campaign.
Step 2: Customize Your Live Sales Notification
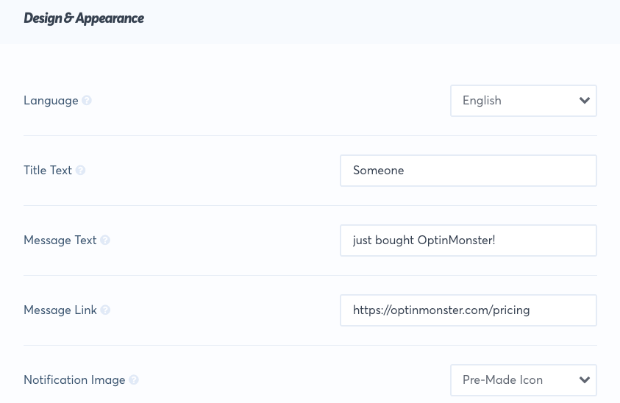
TrustPulse gives you full control over how your notification looks and what it says. This includes:
- Language
- User name display (in case the buyer’s name can’t be identified)
- Message text
- Message link
- Notification image
Every time you make a change here, you’ll see the same reflected in the preview at the bottom of the page:
So in the Message Text field, if you’re selling something specific like shoes, you can mention “just purchased some new shoes!”
Or if you have a product like OptinMonster, you can say “just bought OptinMonster!”
The Message Link field is more powerful than it looks. You can add a link to your product, sales, or pricing page. You can use this feature to boost upsells, cross-sells, and flash sales.
Next, you can add your own image or icon to display in the popup. You could display a product image or your logo to create brand awareness.
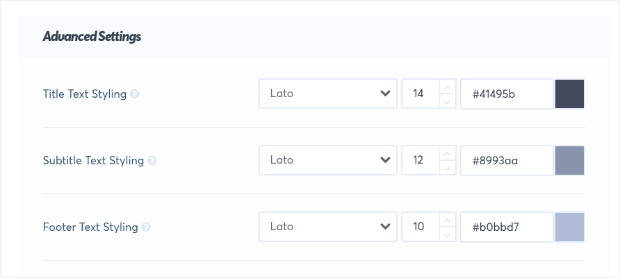
Below that, you’ll see options to control where your notification appears on the page. Then there are Advanced Settings to further customize the text color scheme, style, and more.
With TrustPulse, you can customize every aspect of your popup at the click of a button. You’ll never need to use any code.
Once your popup design is ready, let’s move on to the next step.
Step 3: Capture Sales Activity
Next, you’ll need to tell TrustPulse what activity you want to track on your site. Like we said earlier, if you don’t have sales, you can track other activities like form submissions and newsletter signups.
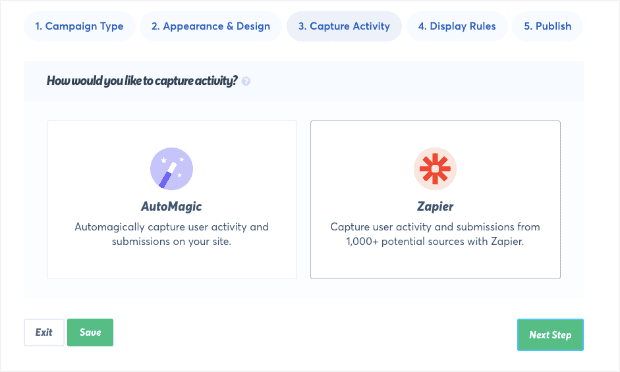
In the Capture Activity tab, you’ll see 2 options: AutoMagic and Zapier.
- AutoMagic captures activity taken on your domain. This can include people signing up for emails, buying something, submitting a contact form, and more.
- Zapier is an automation software that lets you connect your site to third-party apps. That means you can capture activity from outside your website like Google reviews, Facebook page follows, and more!
Since we want to capture purchases on your site, we’ll choose AutoMagic.
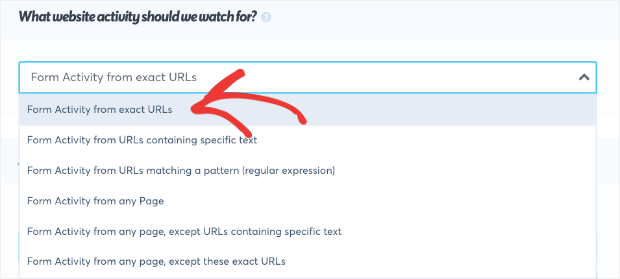
Next, you’ll see a drop-down box to select the activity you want to capture.
AutoMagic will capture any form activity from:
- Exact URLs
- URLs containing specific text
- URLs matching a pattern (regular expression)
- Any page
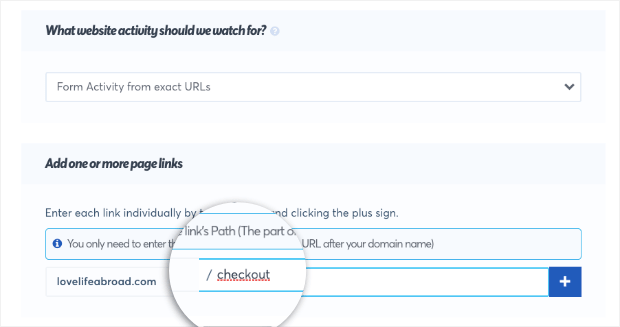
Below this drop-down, you can enter the exact URL you want to track.
So for your WooCommerce store, you can add your checkout page URL here. Then when a customer buys something by submitting the checkout form, TrustPulse will showcase their purchase.
This field is pre-filled with a default website URL checkout page like mydemostore.com/checkout. That means you won’t need to change this unless you have a custom URL.
The next step is to target your customers by displaying them at the right place.
Step 4: Set up Display Rules
Display rules let you target your shoppers in different ways using multiple campaigns based on the page or product your visitor is viewing.
If a shopper is on a product page, for example, you can display recent sales notifications to nudge them to buy. But if they’re viewing any other page, you can show them a discount message to get them to visit your product page.
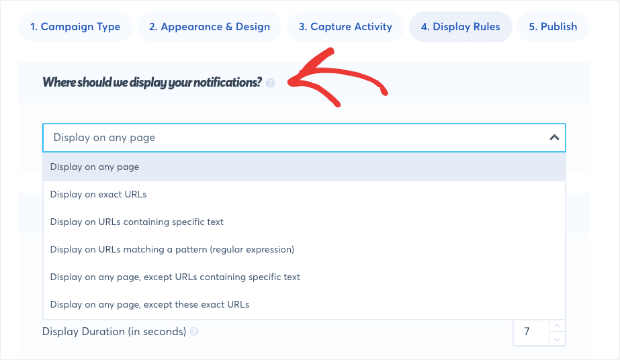
In the Display Rules tab, you can choose to show notifications on:
- Any page
- Exact URLs
- URLs containing specific text
- URLs matching a pattern
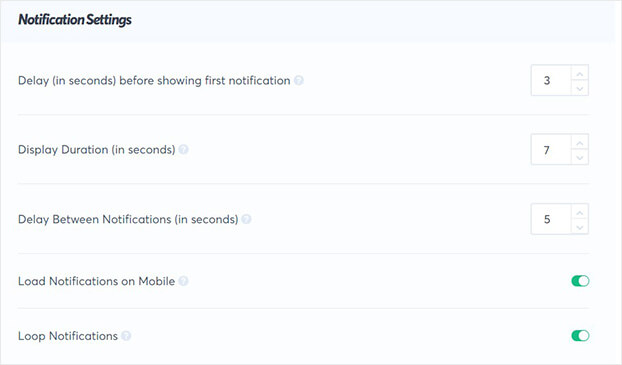
There is a list of rules you can explore here. Once you’ve set the notification to appear at the most effective place, you can customize the timing and duration of the popup.
There’s also an option to turn on/off notifications on mobile so you can target your shoppers based on their device, too.
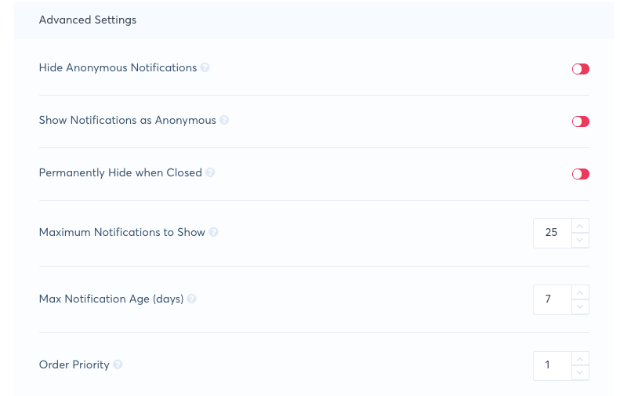
Below these options, there are Advanced Settings where you can explore more configurations.
If you’re creating multiple notifications to capture different activities, then you’ll want to use the Order Priority feature here.
This lets you tell TrustPulse which campaign is more important and in what order they should appear.
If you’re running a limited period sale, for example, you can show an action message alerting people about your sale to drive maximum traffic.
Now instead of turning off the other campaigns, you can set the order priority to “1” so the flash sale campaign takes first place.
With that, your campaign is designed, configured, and ready to be published!
Step 5: Publish Live Sales Notification
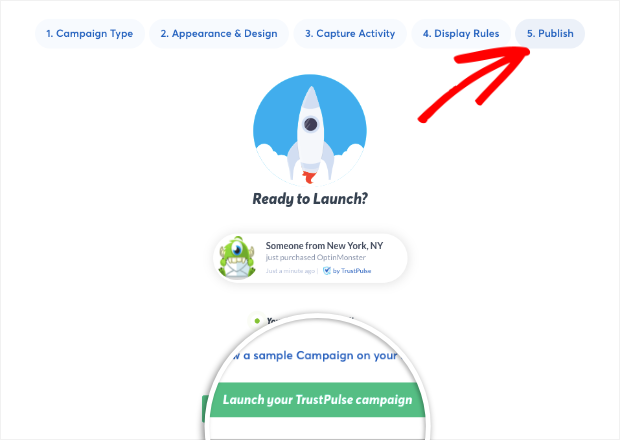
In the last step, you’ll see a preview of your campaign before you publish it.
All you need to do is hit the Launch your TrustPulse campaign button and that’s it! TrustPulse will start tracking sales activity and automatically create and display the popups on your site.
In case you haven’t connected to your WooCommerce store yet, you’ll see an alert that your site isn’t connected.
You can click the Check Now button and sync your website now.
After your campaign has run for a while, you can access analytics from the TrustPulse dashboard to see how it’s performing.
Inside, you can see campaign stats like:
- User name and location
- Trends and performance
- Highest converting pages
- Viewers and clicks
At this point, you’re all set with live sales notifications. If you’re interested in boosting sales with more notifications, we have a few more tips in store for you.
More Ways to Skyrocket Sales and Conversions
Live sales notifications increase trust and confidence in shoppers but they may still need a little push to buy. For that, you need OptinMonster.
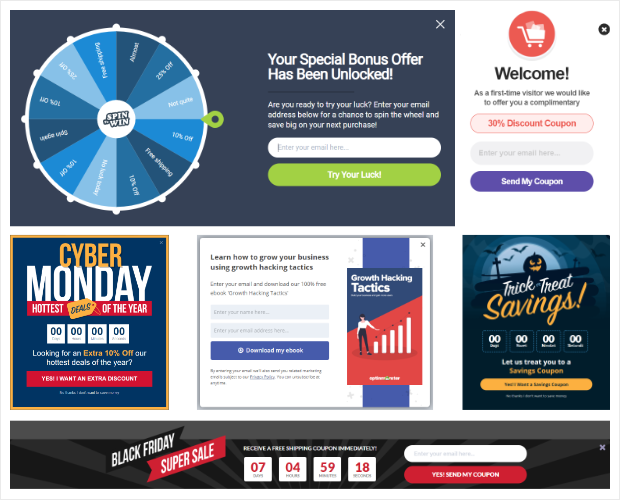
OptinMonster is the best conversion optimization tool for WooCommerce. You can create popups, floating bars, slide-ins, inline forms, and more to promote your products and sales.
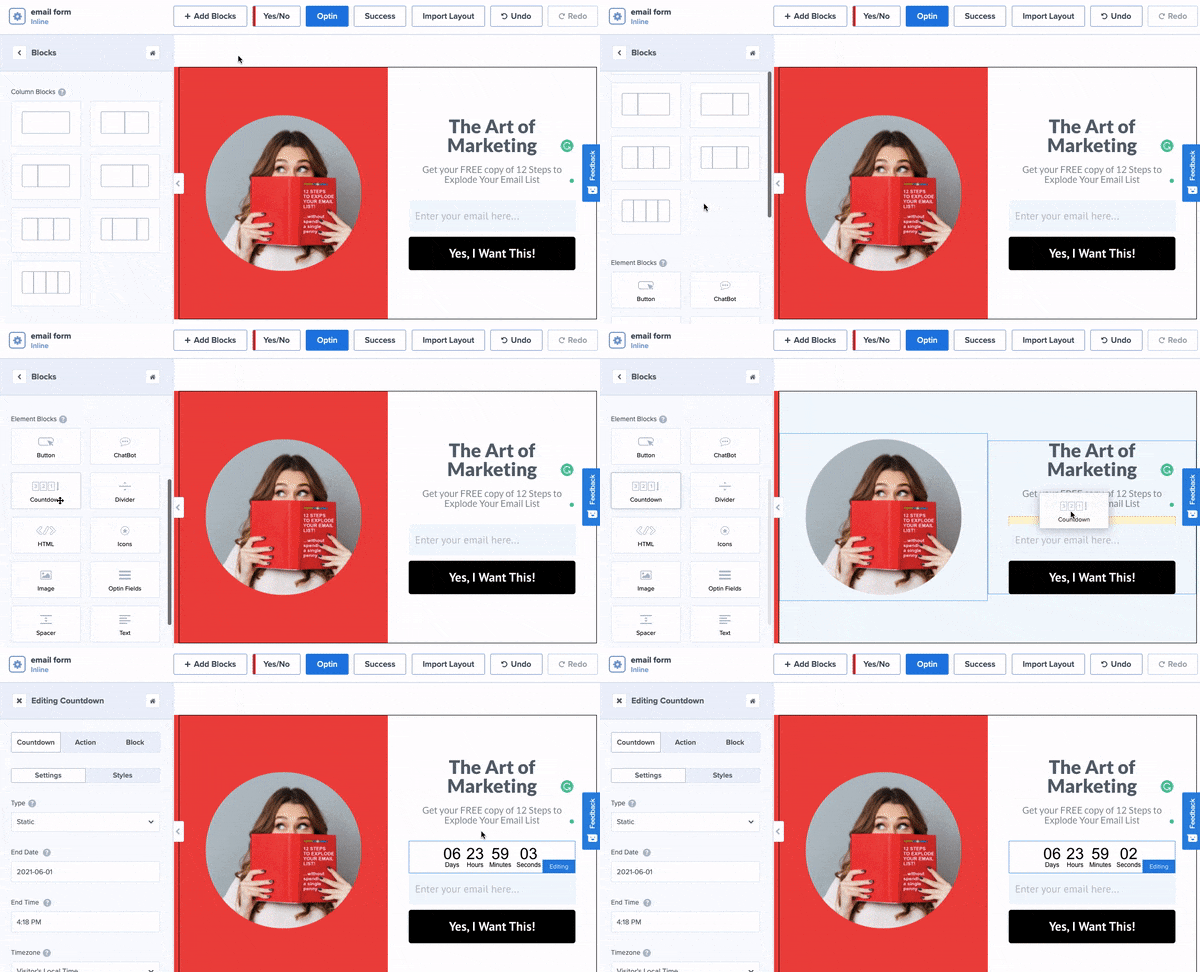
OptinMonster comes with 50+ templates and a drag and drop builder to create campaigns in a matter of minutes. You can even add elements like countdown timers to add a sense of urgency.
OptinMonster designs are flexible and fully customizable so you can create campaigns for:
- Flash/seasonal sales
- Recovering abandoned carts
- Promoting products
- Offering discounts and incentives
- Growing your email list
You can even create spin-the-wheel games to give customers a chance to win a discount or free shipping. This can make your site more fun and engaging.
What really stands out about OptinMonster is its unmatched targeting rules. You can trigger campaigns based on a user’s actions, behavior, and interests on your site.
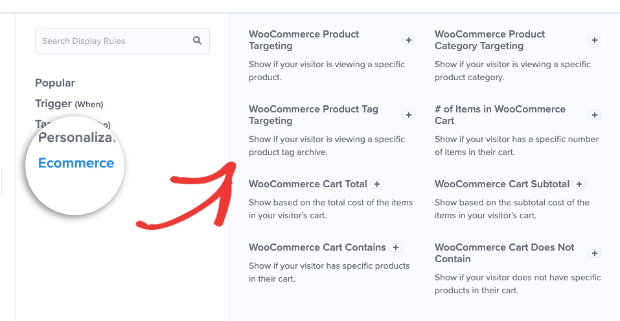
There are WooCommerce specific rules to target people according to product pages, items in cart, cart total, and much more.
You can add these rules by simply clicking a button, there’s absolutely no coding required. Some of OptinMonster’s popular rules include:
- Exit Intent®: Recover abandoning users by giving them an incentive to sign up or buy something
- On click: Make a popup appear when a user clicks on a button, link, or image on your site
- Page view: Show only if a visitor is on a specific page
- New/Returning visitor: Display based on whether it’s a first-time visit or they have been to your site before
- Physical Location: Interact with a visitor based on their geographical area
- Referral Targeting: Connect with visitors that are coming from specific channels like Facebook or Google
These are just a few examples, though there are many others.
You can even create campaigns targeted at returning customers to increase average order value.
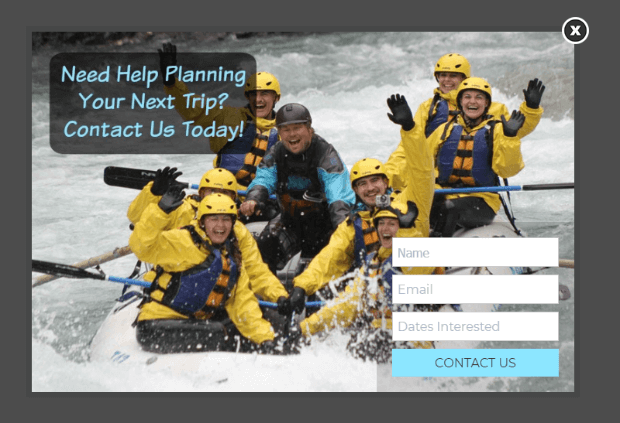
OptinMonster is so powerful that it’s how Wild Water Adventures increased sales by $61,000.
Want the same results? Then get your 100% risk-free account right away by clicking below:
And that’s all we have for you today. We hope you found this step-by-step tutorial helpful.
Now that you’ve set up live sales notifications for WooCommerce, you’ll definitely want to check out these resources to increase sales even more:
- How to Recover Abandoned Carts and Skyrocket Sales
- 12 eCommerce Marketing Strategies to Skyrocket Conversions
- The Ultimate eCommerce Optimization Guide to Boost Revenue
You’ll find proven strategies to increase sales and grow your WooCommerce store.







Add a Comment