OptinMonster makes it easy to create a fully customized campaign form. You can easily add radio buttons, phone fields, text areas, number fields, lists, and more using our Field Mapping feature!
In this article, you’ll learn how to use Field Mapping to add extra fields to your OptinMonster campaign form.
Supported Integrations
Field mapping is a brand-new feature available for our most popular Email Service Providers, including:
– ActiveCampaign
– AWeber
– Constant Contact
– ConvertKit
– Customer.io
– Drip
– GetResponse
– HubSpot
– Keap (Infusionsoft)
– Klaviyo
– Mailchimp
– MailerLite
– Marketo
– Monster Leads
– OmniSend
– Salesforce Marketing Cloud Account Engagement (formerly Pardot)
– Webhook
– Zapier
Support for all of our integrations will be coming in the near future!
If Field Mapping isn’t available for your integration yet, you can add extra fields to your campaign using the Form Embed block following this guide.
Add Fields
To start building a custom optin form you’ll want to add fields to your design.
To customize your optin form using OptinMonster, follow these steps:
- Before you start, the Email Address field is always required when using a native integration with OptinMonster. See our FAQs for details on how to add a form to your campaign that does not contain an email address field.
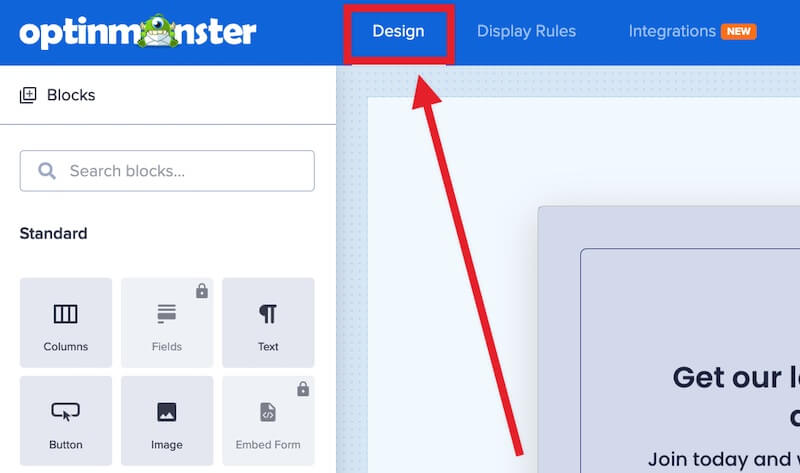
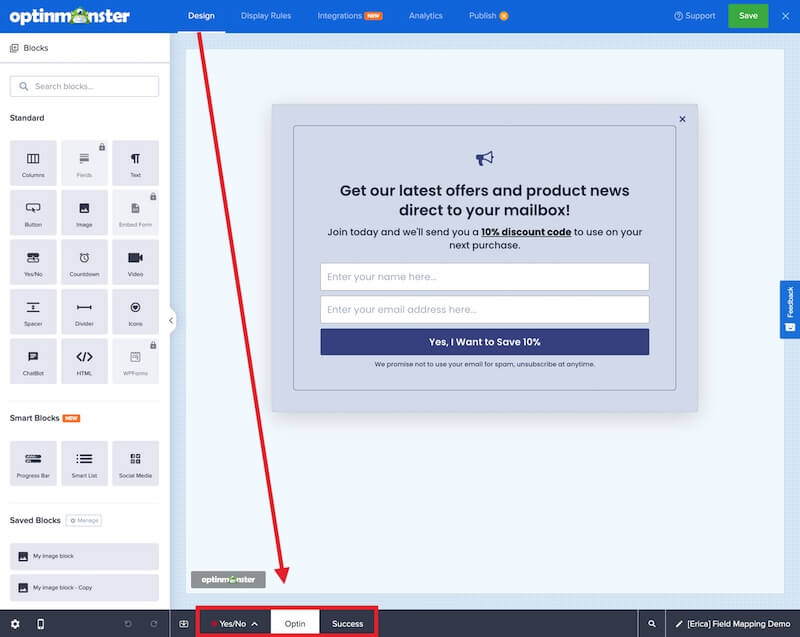
- Navigate to the Design screen of the campaign builder to begin customizing your campaign.
- Be sure you are editing the campaign view containing your optin form.
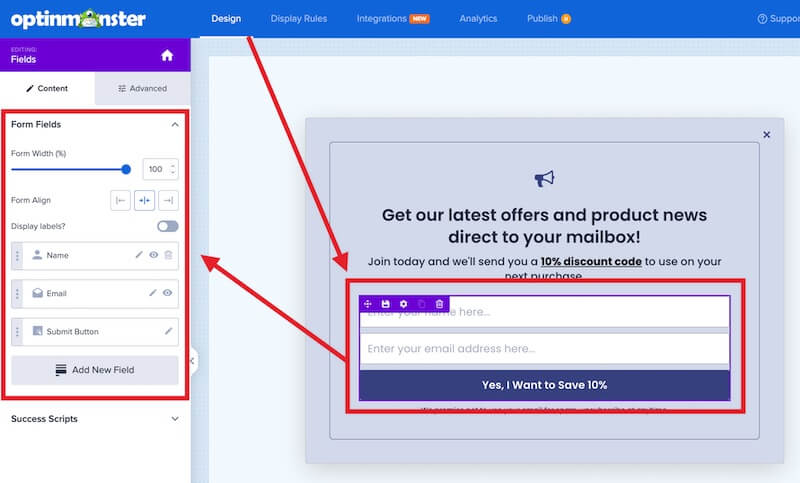
*In most instances this will be the Optin view, however, you may have moved the Fields block to another view. - Click anywhere within the Fields block in the design pane of the builder, options for editing your optin form’s fields will appear in the left sidebar panel.
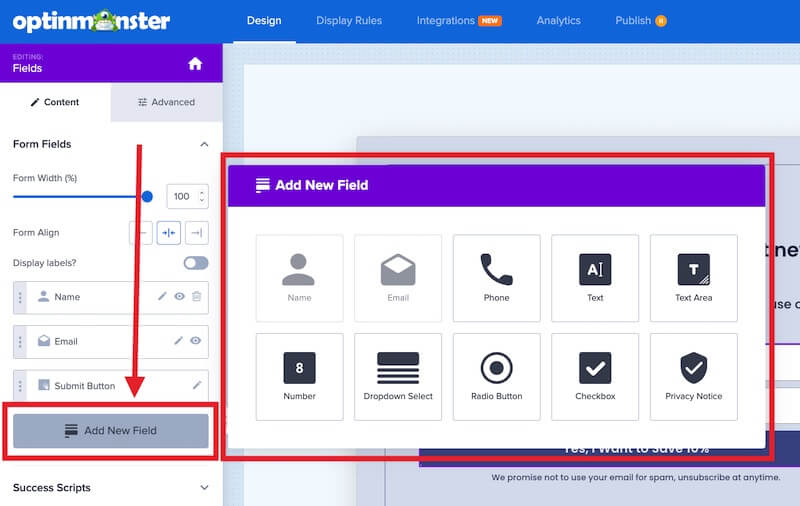
- To add extra fields, select the Add New Fields button and a modal will appear where you can select any specific type of field you wish to add to your optin form.
You can select from the following field types:- Name – does not require Field Mapping, works with all integrations
- Email – does not require Field Mapping, required for all integrations
- Phone – does not require Field Mapping, works for all integrations. Cannot be repurposed to capture other numerical data, for that you should use a Number field and configure with Field Mapping.
- Text
- Text Area
- Number
- Dropdown Select
- Radio Button
- Checkbox
- Privacy Notice – does not require Field Mapping, works for all integrations, displayed in form but no data is passed to Email Service Provider. *For GDPR requirements you should use a Checkbox field and configure with Field Mapping instead.
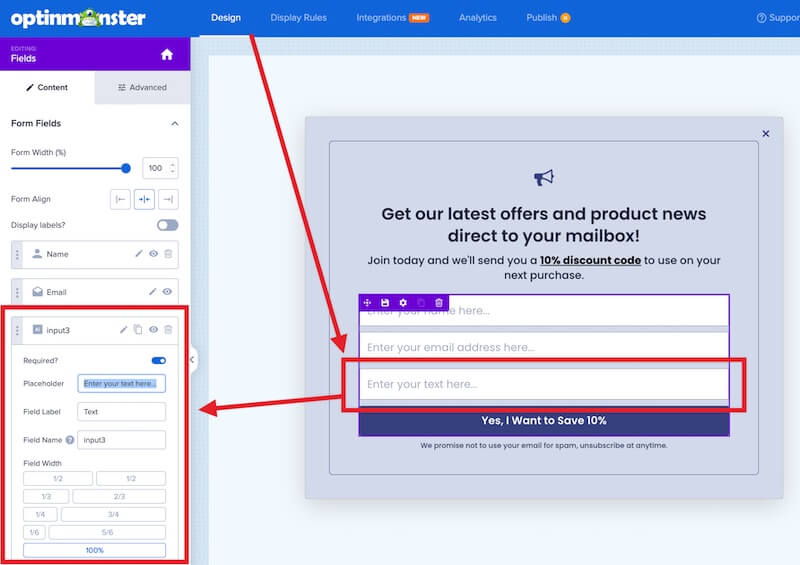
- Once you select a field to add to your optin form you can configure its settings in the left sidebar panel.
- When you’re finished, Save your campaign.
Field Options
Global Field Options
When adding fields to your optin form, you’ll find the following options available:
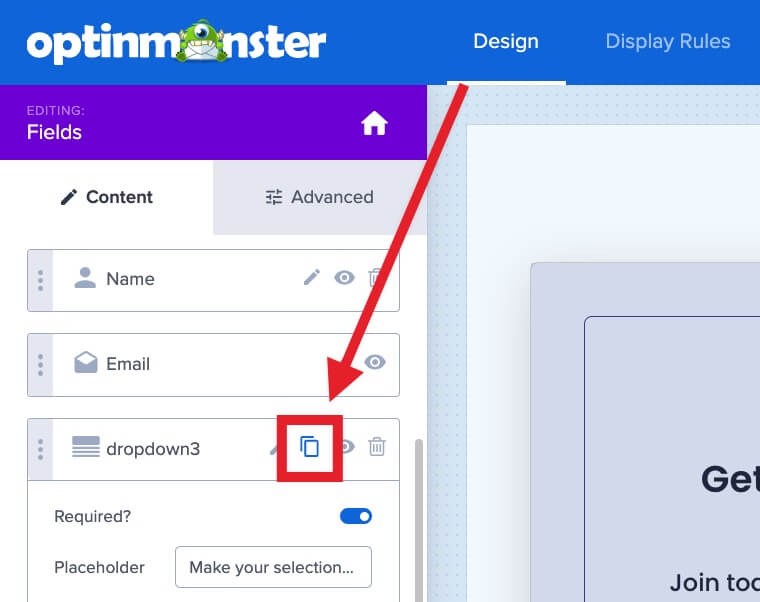
Duplicate Field
You can quickly duplicate any field by selecting the duplicate icon from the left sidebar panel when editing the optin form:
Make Field Hidden
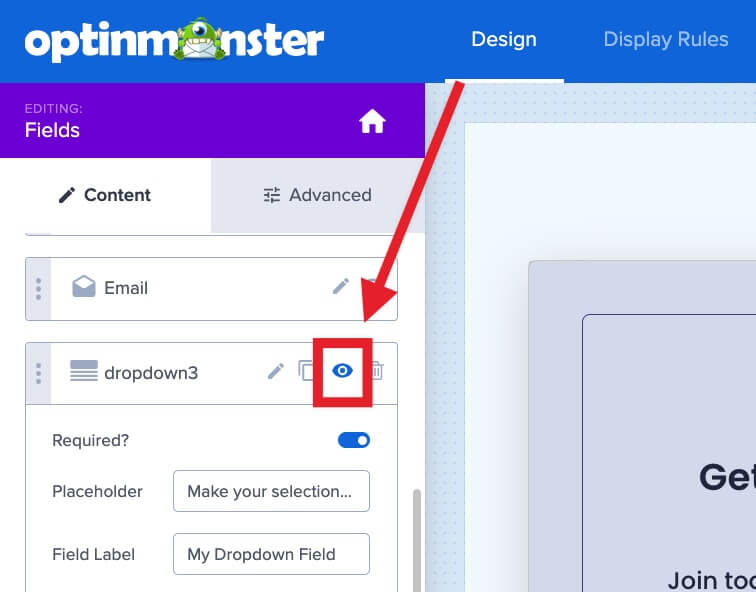
You can make any field hidden by toggling the eye icon when editing the optin form:
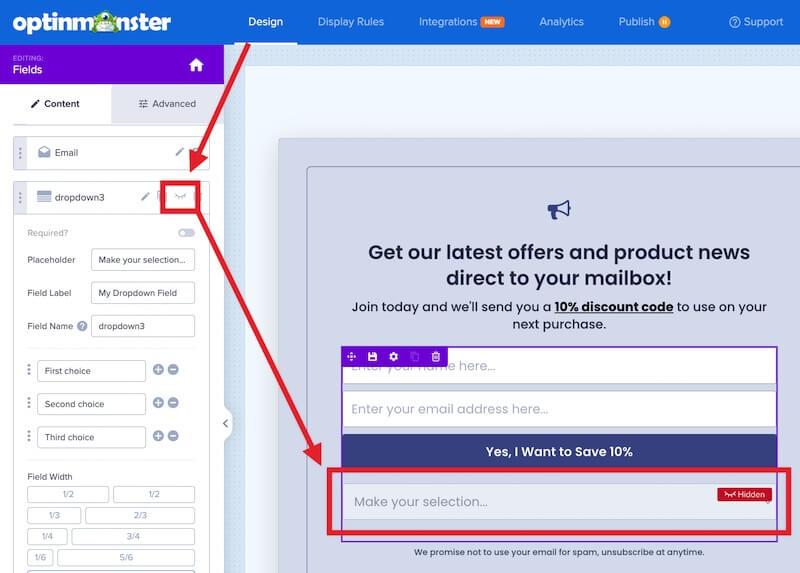
Once a field is made hidden it will be moved below the Submit button in the design view and a Hidden label shown to indicate the field will not be visible when the campaign is displayed on your site:
Delete Field
You can delete any field from your optin form by selecting the Trash icon while editing the optin fields:
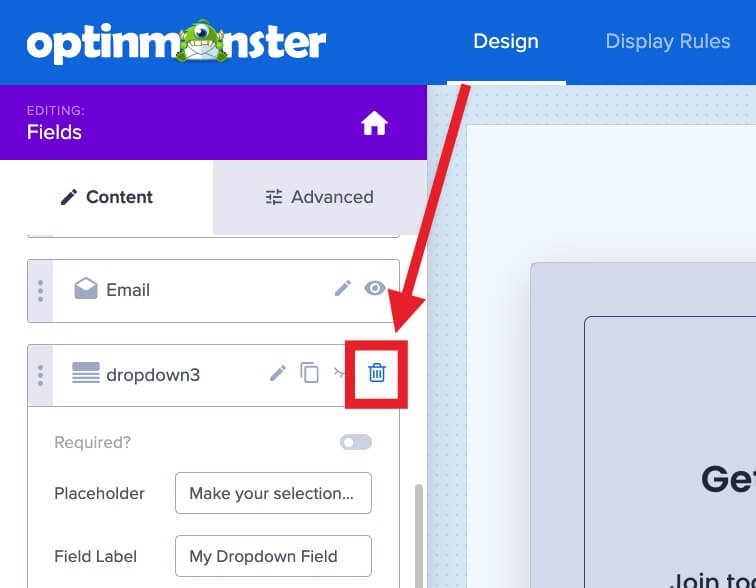
*The Email field is always required when using our native integrations and cannot be deleted.
See our FAQs for details on how to add a form to your campaign that does not contain an email address field.
Make Field Required
You can make any field required or optional by toggling the Required option when editing the optin form:
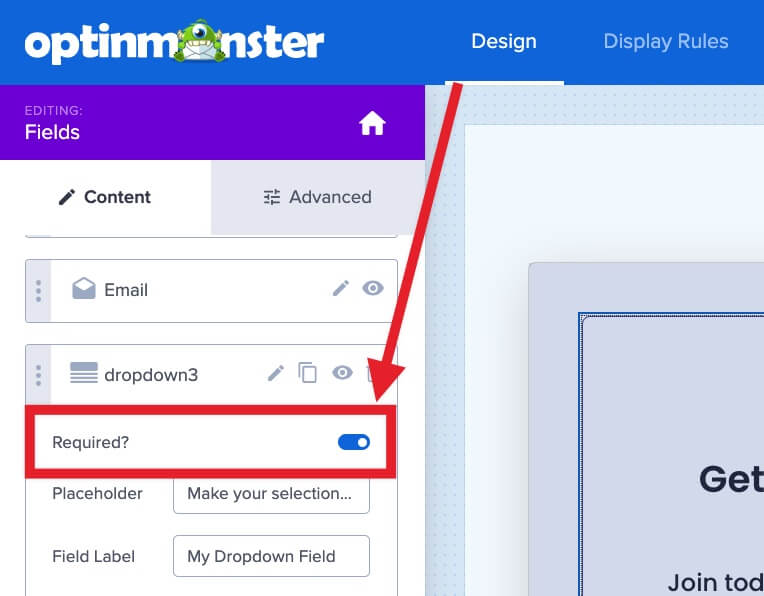
*The Required setting is enabled by default when adding new fields.
The Email field is always required when using our native integrations and cannot be made optional.
See our FAQs for details on how to add a form to your campaign that does not contain an email address field, or makes the email address field optional.
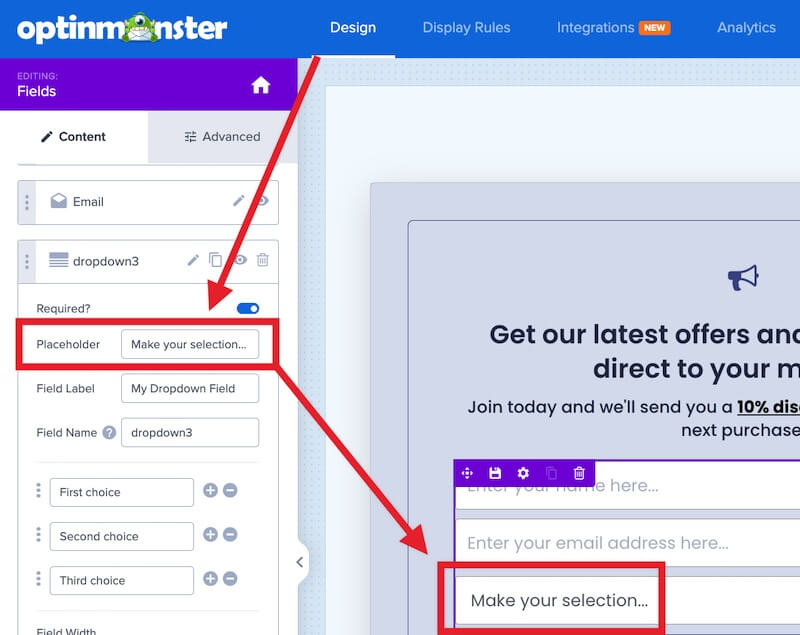
Placeholder
The Placeholder is text that will be displayed inside the field. This text is typically used to instruct the visitor on what information to enter into the field, and it is not passed as data to your Email Service Provider.
You can customize the Placeholder text while editing the optin field:
Field Label
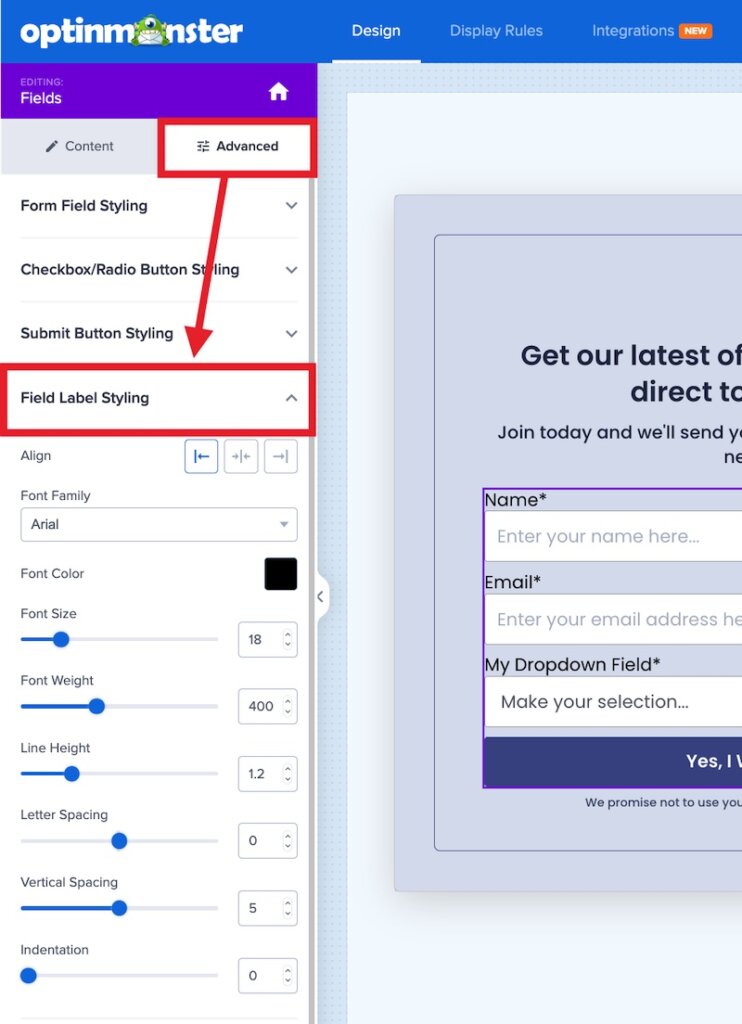
The Field Label is text displayed outside of the optin field, if the Display labels? setting is enabled for your optin form. Field Labels are used by screen readers to improve accessibility for your site visitors and is recommended.
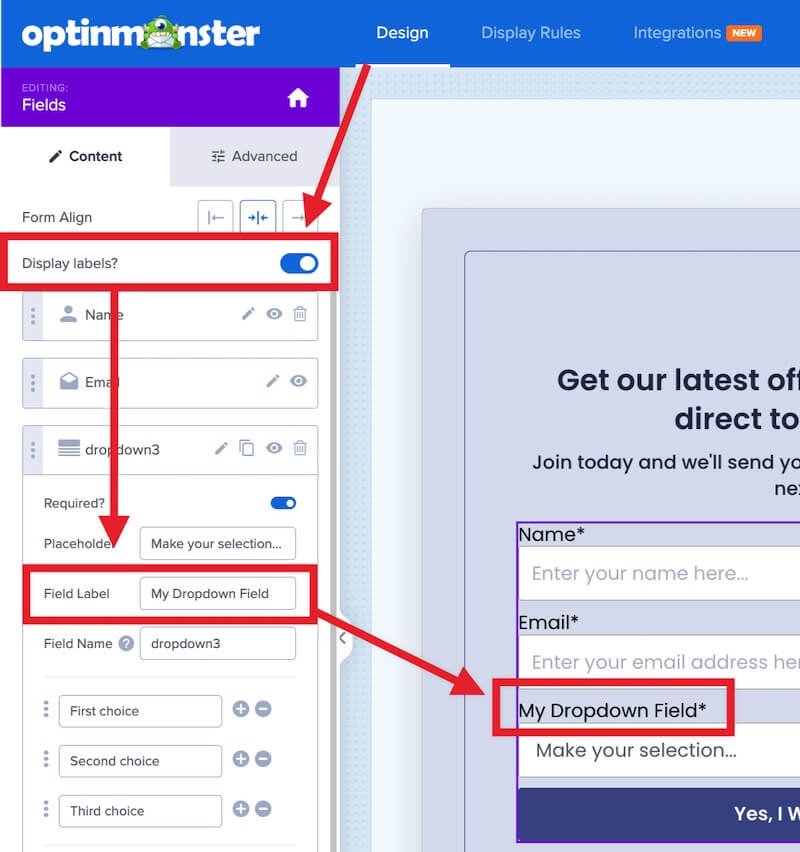
You can customize the Field Label styling in the Advanced tab > Field Label Styling section:
Field Name
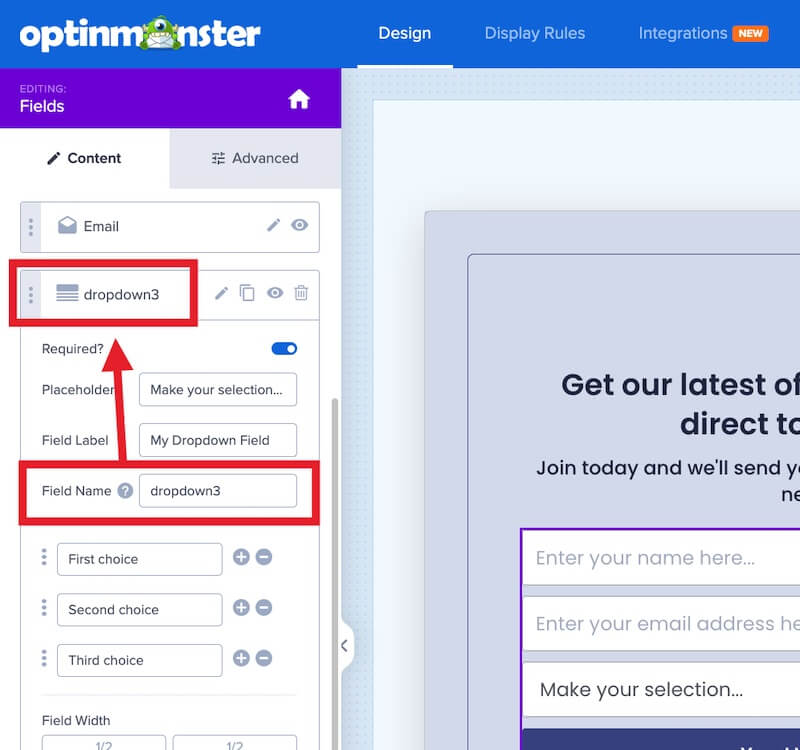
The Field Name is used internally to identify individual fields in your optin form. This is also the name used to identify each field when you configure Field Mapping.
The Field Name should be unique for each field you add to your optin form.
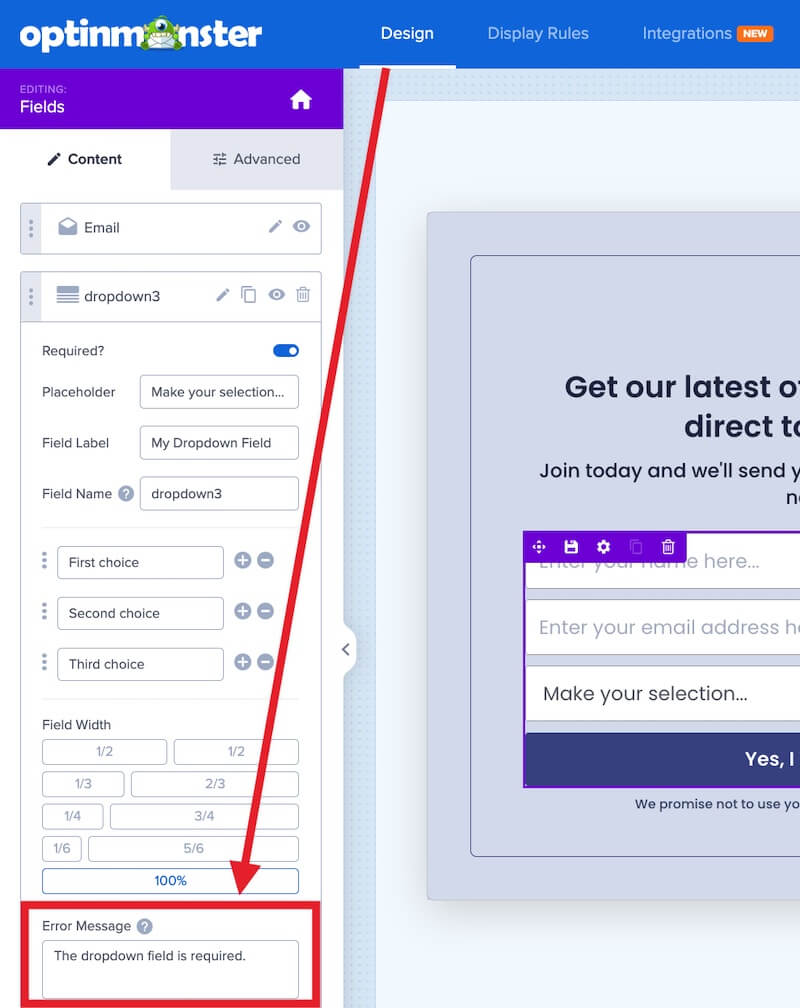
Error Message
You can customize the Error Message for any field you add to your optin form:
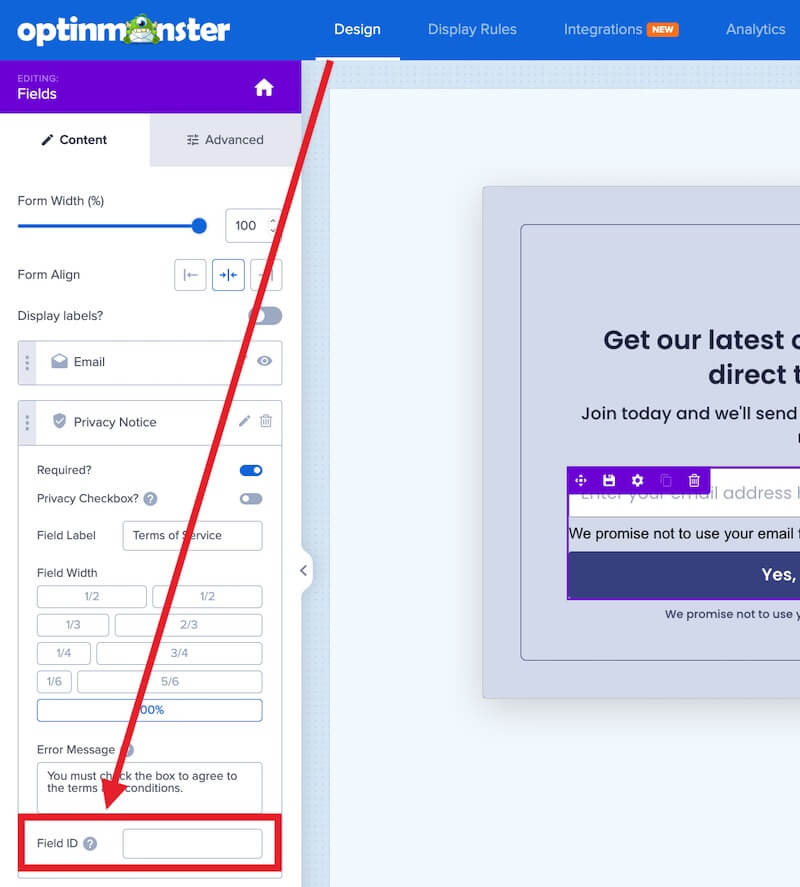
Field ID
If you’re using Custom CSS or Custom Javascript with your OptinMonster campaign you may need to set a Field ID to easily identify a specific optin field. That can be added when editing any optin field:
Default Value
The Default Value field is available when configuring the following fields:
- Name
- Phone
- Text
- TextArea
- Number
- Dropdown
Smart Tags are also supported in the Default Value field. For many optin fields a Smart Tags icon is available to quickly find and enter default Smart Tags:
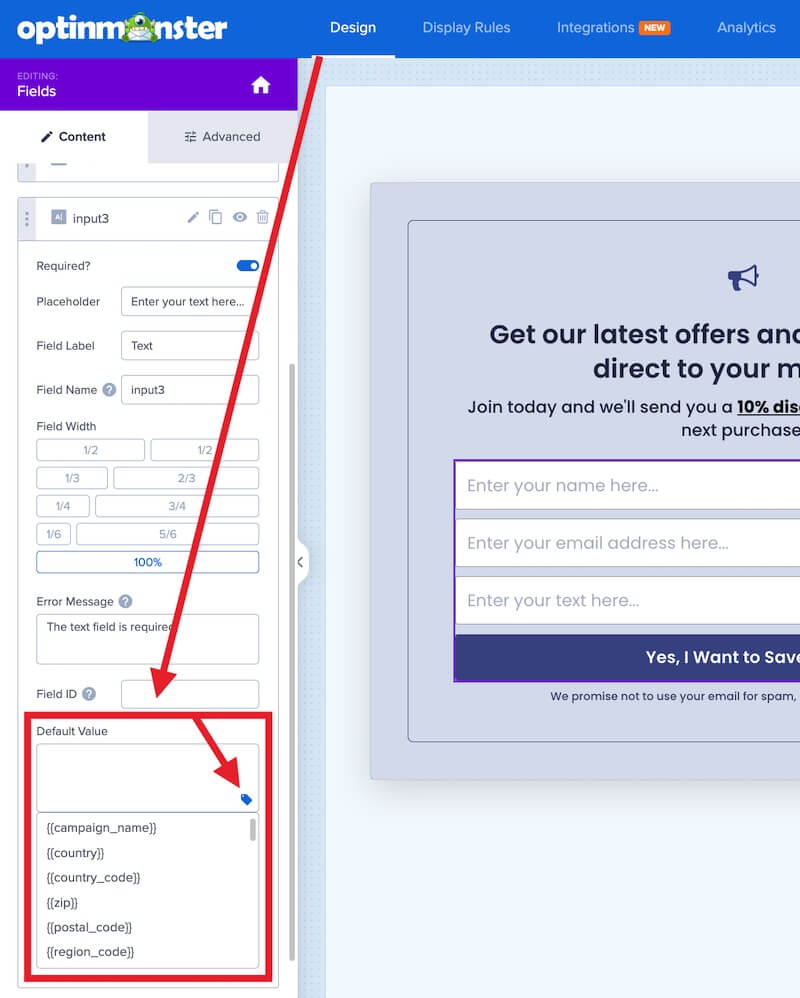
The Default Value will populate the input field and is passed as data to your integration if the visitor does not edit the field before submission.
Specific Field Options
Some fields contain additional specific configuration options:
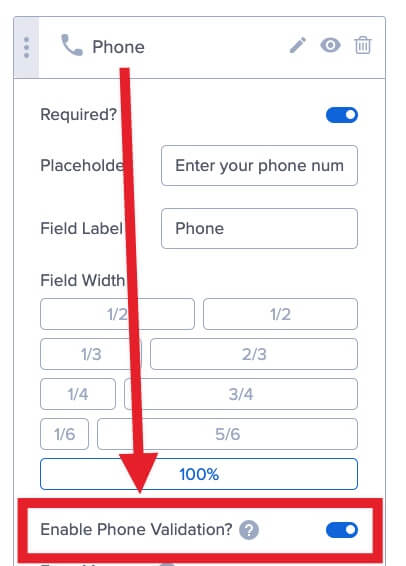
Phone
Enable phone field validation?
Disabled by default. When enabled, the user will only be able to submit the following characters: 0-9, (), -, +, .
Text Area
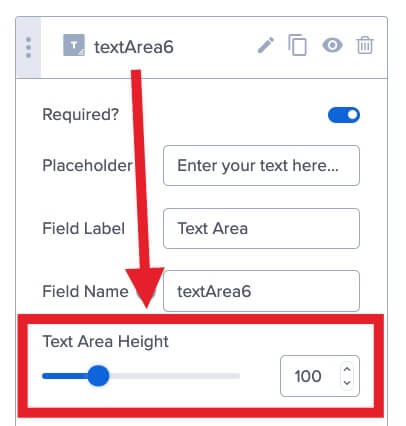
Text Area Height
Configure the Text Area field’s height, in pixels.
Number
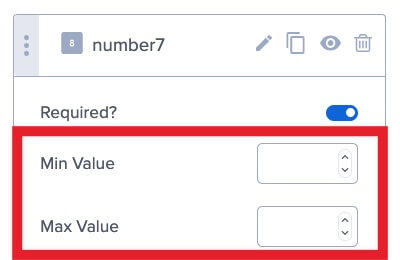
Min / Max Value
Set a minimum or maximum number value for the Number field:
Dropdown / Radio Fields
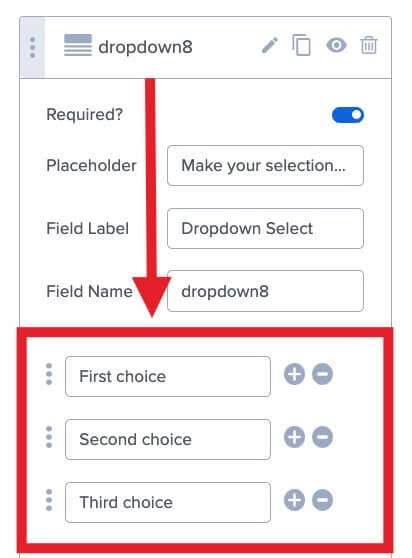
Field Options
You can add, remove, and arrange specific field options for Dropdown and Radio fields:
Radio
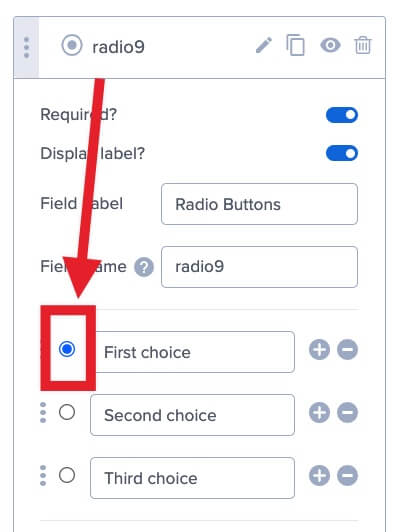
Default Selection
By default, no option will be pre-selected for your Radio fields. To make an option pre-selected you can toggle the item:
Add Integration
Before Field Mapping can be configured, you’ll need to integrate your campaign with the Email Service Provider you use to store, manage, and email leads from. Follow the documentation for your specific Email Service Provider below to connect your campaign.
Field Mapping
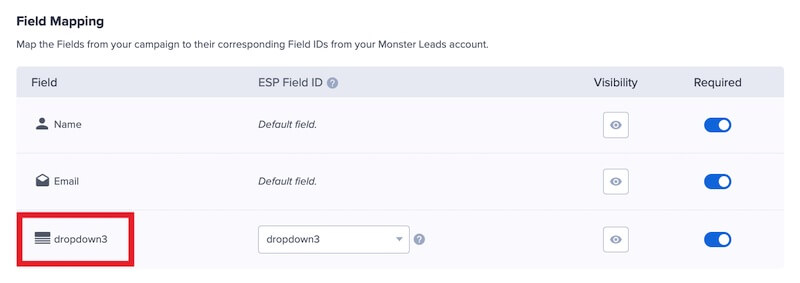
Now that your campaign’s optin form has been customized and you’ve connected your Email Service Provider integration, Field Mapping can be customized! Field Mapping ensures your optin fields are sent to the correct custom fields in your Email Service Provider platform.
Before you start, some integrations require you manually add the custom fields before you map your fields to them. Be sure to check the Supported Integrations section above for your specific integration requirements.
To map your optin fields, follow these steps:
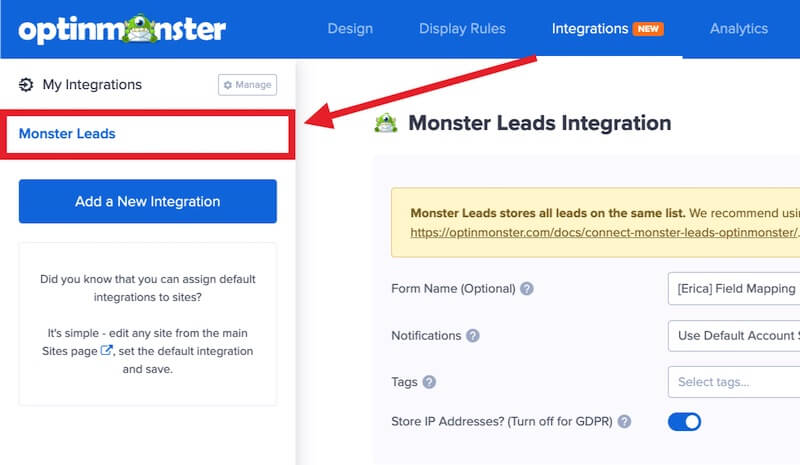
- Navigate to the Integrations screen in the campaign builder and select the integration you want to configure Field Mapping for.
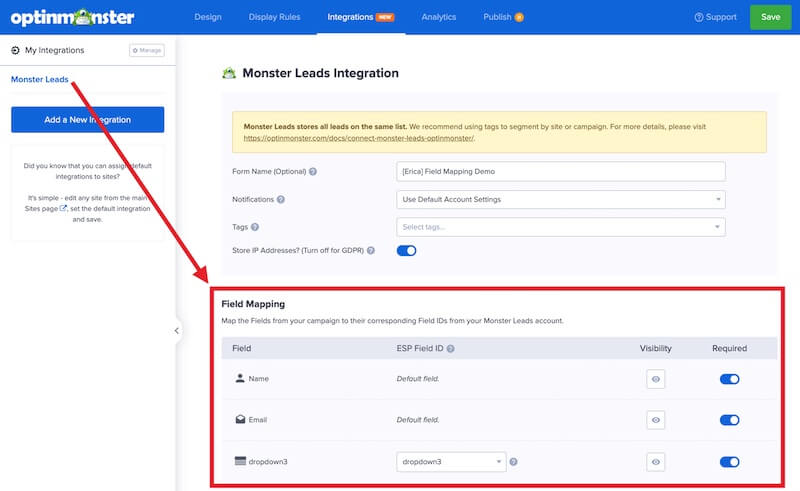
- Below the integration details, you’ll find the Field Mapping section which lists all optin fields added to your campaign.
- The unique Field Name you’ve given to each field in your optin form will be displayed in the first column.
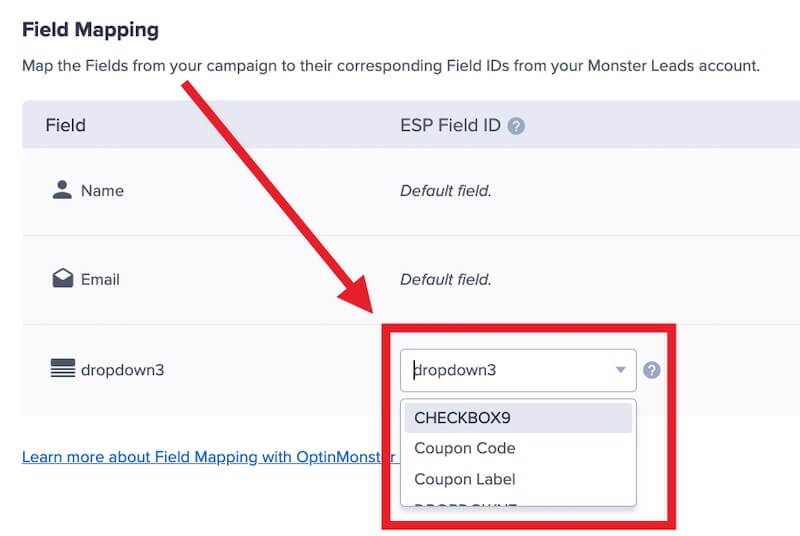
- In the second column, select the custom field you want to map the optin field to in your Email Service Provider platform.
*The Name, Email, and Phone fields cannot be manually mapped to custom fields.
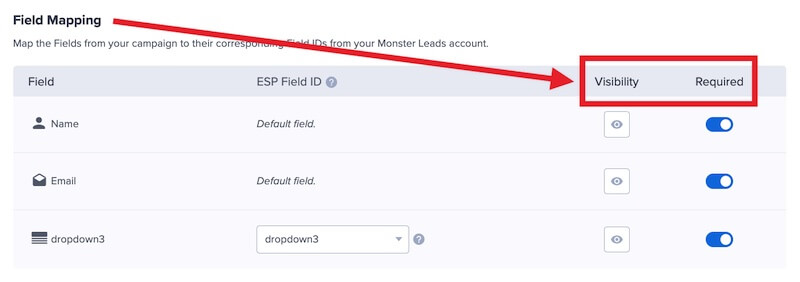
**Not all integrations allow us to pre-fill this field with existing custom fields. For best results, we recommend you confirm the custom field you want to map to has already been created in your Email Service Provider account, and type the Field ID into the option. - Optional: You can also control individually mapped fields’ Visibility and Required settings.
- When you’re finished, Save the campaign.
- Recommended: Before you Publish the campaign we recommend you test the optin form to ensure the data is captured in your Email Service Provider as you expect. Get started Testing your campaign using the Live Site Inspector tool.
FAQs
How can I prevent spam submissions?
We automatically add a hidden honeypot field to our optin forms to prevent spam, and recommend you configure Google reCAPTCHA for an added layer of protection.
You can also use our Lead Verification feature to further filter and prevent spam submissions.
How can I add a form to my campaign that does not contain the Email Address field?
The email address field is always required when using one of our Email Service Provider integrations.
To create an optin form that does not capture an email address you’ll need to:
- Create a form directly from your ESP’s form builder (if they support this).
- Add your custom form’s embed code using our Form Embed block, following this guide.
Troubleshooting
I’m having issues with mapping a field.
The most common problem associated with field mapping configuration is attempting to map a custom field in your campaign to a default field in your Email Service Provider. For example, using a Text field in OptinMonster to capture the First Name and pass it to the default First Name field in your ESP.
It is not possible to map a custom field in OptinMonster to a default field in your ESP. Custom fields in your campaign can only be mapped to custom fields in your ESP.
To send data to a default field you should use the appropriate pre-made field in OptinMonster, for example use the Name Field to send data to the default Name field(s) in your ESP. Or use the Phone field to send phone data to the default Phone field in your ESP.
If you are still encountering issues and the above details do not directly address the configuration you are attempting, please reach out to our support team. We are delighted to help!
My campaign doesn’t contain an optin form, how do I add one?
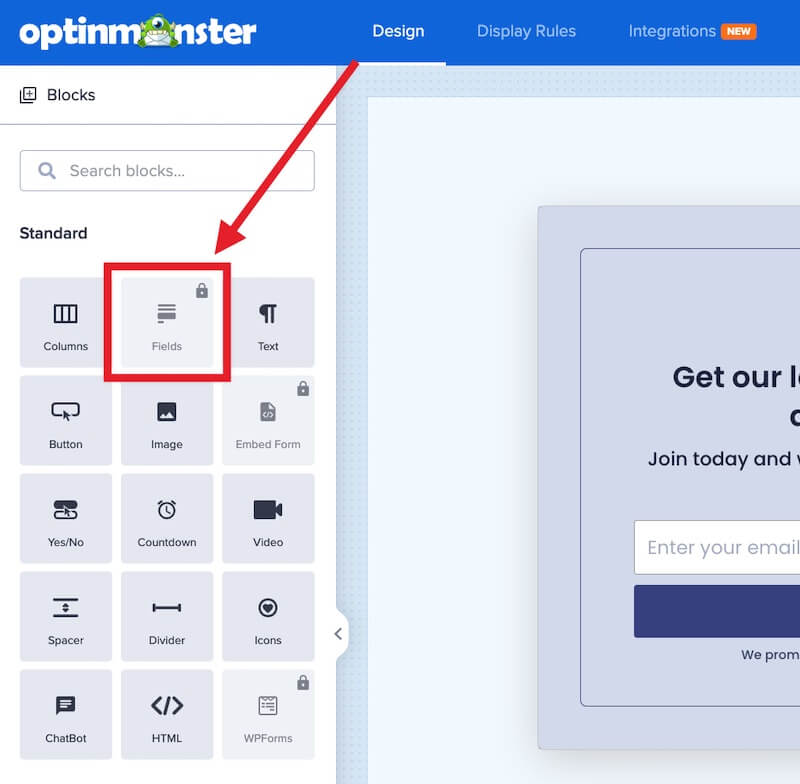
If your campaign doesn’t yet contain an optin form you can add it to your design by dragging the Fields block into the campaign where you want it to appear:
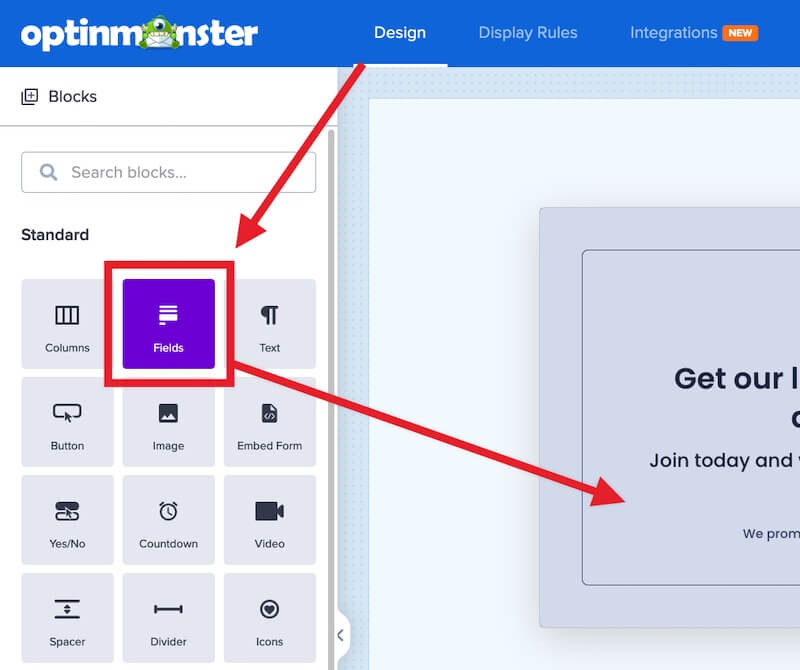
If the Fields block is not available it indicates that your current campaign view already contains a Fields block. It is only possible to add one Fields block to any single design view.
